Homemade Peanut Butter Cups Vegan Style
Highlighted under: Decadent Desserts
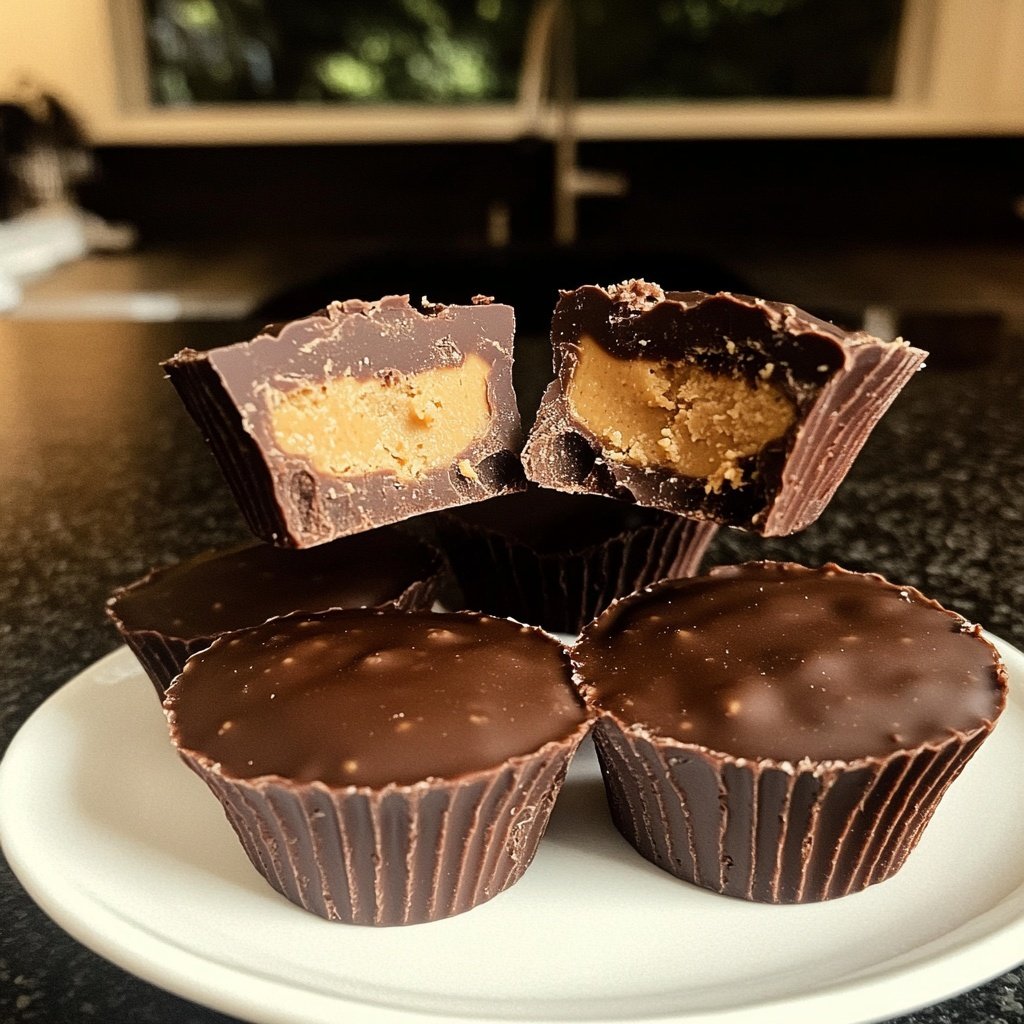
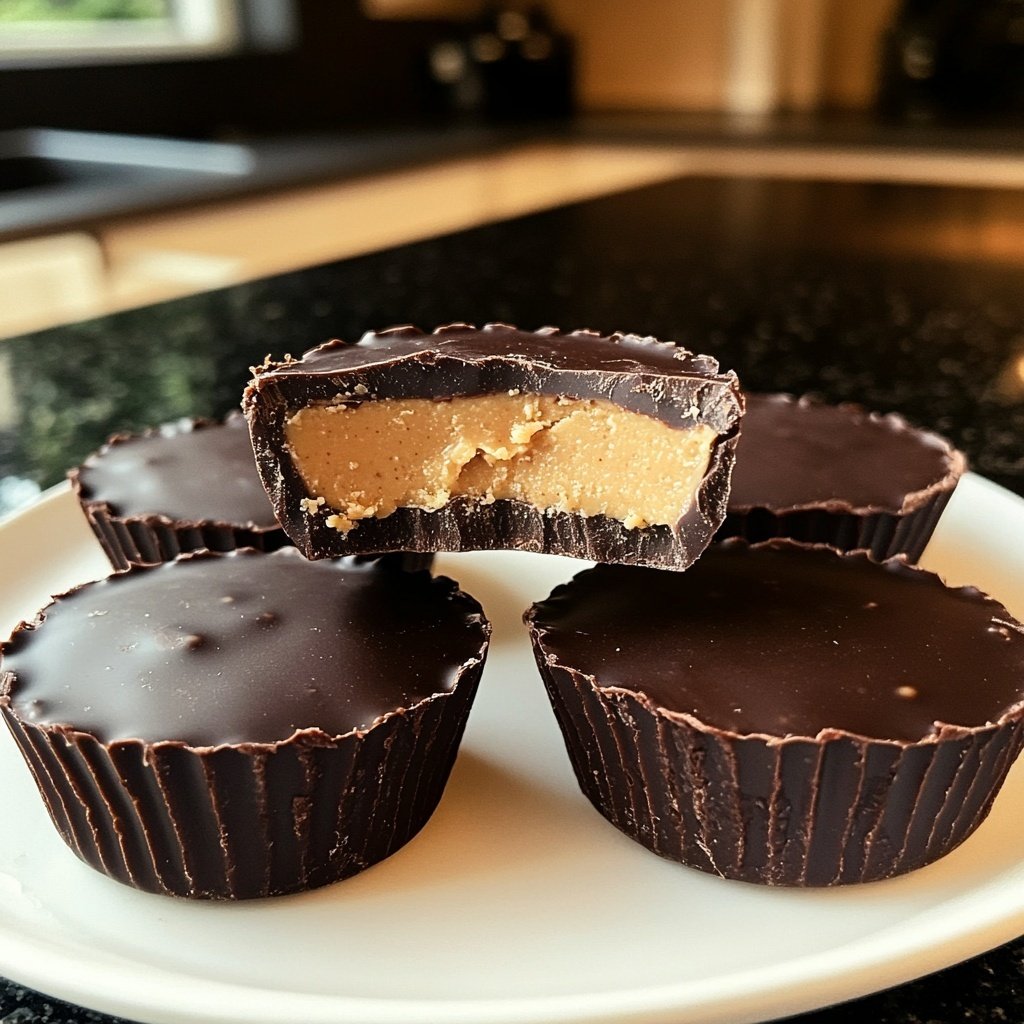
I absolutely love making these homemade peanut butter cups, especially since they’re vegan! The combination of rich chocolate and creamy peanut butter evokes childhood memories while staying guilt-free. It’s amazing how simple ingredients can come together to create such a delightful treat. We often whip these up as a special dessert for gatherings or even to enjoy as a snack. Plus, they’re incredibly easy to customize with different nut butters or add-ins, making them a versatile treat that everyone can enjoy.
When I first tried to make these peanut butter cups, I had no idea how easy it would be! I was amazed at how well the dark chocolate and peanut butter blended together. As I experimented, I discovered that using coconut oil in the chocolate helped it set perfectly. It adds a glossy finish that’s absolutely irresistible.
One tip I want to share is to let the cups cool at room temperature before refrigerating. This ensures they hold their shape without becoming too hard. I often find myself reaching for these quick snacks during the day, and I know you will too!
Why You'll Love This Recipe
- Rich chocolate flavor that's completely dairy-free
- Creamy peanut butter center that melts in your mouth
- Quick and easy to make, perfect for any occasion
The Importance of Ingredients
To create the best homemade peanut butter cups, the quality of your dark chocolate chips is crucial. Look for dairy-free varieties that contain at least 70% cocoa for a rich flavor. I recommend brands that use natural sweeteners, as they contribute to a better taste profile without overpowering the peanut butter. This balance is key to achieving a satisfying treat that appeals to both kids and adults alike.
Coconut oil not only aids in melting the chocolate smoothly but also helps the chocolate harden with a glossy finish. If you don't have coconut oil, refined avocado oil can serve as a substitute without altering the taste significantly. Just be careful with the amount; too much oil might prevent the chocolate from setting properly, which can result in a messy cup.
Mastering the Assembly Process
When preparing to assemble your peanut butter cups, make sure to use a standard muffin tin with high-quality cupcake liners. This ensures easy removal after they've set. Pouring the chocolate into each liner should be done carefully, ensuring you cover the bottom evenly—this is crucial for achieving that satisfying chocolate shell texture. If you prefer thicker cups, consider pouring a bit more than a tablespoon into each liner while keeping track of the total amount used.
After adding the peanut butter filling, remember to smooth out the top before adding the final layer of chocolate. This helps prevent air pockets and ensures the cups hold together well once set. If you find your chocolate is too thick when coating, giving it another brief 10-second burst in the microwave can help achieve the right consistency.
Ingredients
Ingredients
For the Cups
- 1 cup dark chocolate chips (dairy-free)
- 2 tablespoons coconut oil
For the Filling
- 1/2 cup natural peanut butter
- 1/4 cup powdered sugar
- 1/2 teaspoon vanilla extract
Feel free to substitute other nut butters if you prefer!
Instructions
Instructions
Melt the Chocolate
In a microwave-safe bowl, combine the dark chocolate chips and coconut oil. Microwave in 30-second intervals, stirring in between until melted and smooth.
Prepare the Molds
Line a muffin tin with cupcake liners. Pour a tablespoon of the melted chocolate into each liner, smoothing it to cover the bottom.
Make the Filling
In a bowl, mix the peanut butter, powdered sugar, and vanilla extract until creamy and well combined.
Assemble the Cups
Add a spoonful of the peanut butter mixture on top of the melted chocolate in each liner, then cover with more chocolate until the filling is fully enclosed.
Chill and Serve
Place the muffin tin in the refrigerator for at least 15 minutes or until fully set. Once firm, enjoy your homemade peanut butter cups!
Store any leftovers in an airtight container in the fridge.
Pro Tips
- Try adding a sprinkle of sea salt on top before chilling for an extra flavor boost!
Tips for Customization
One of the best aspects of this recipe is its versatility. You can swap natural peanut butter for other nut butters like almond or cashew, allowing you to experiment with flavors. Just keep in mind that different nut butters may have varying consistencies; for instance, almond butter is usually thinner, so you may need to adjust the powdered sugar for the right texture.
For those looking for added crunch, consider mixing in chopped nuts or a sprinkle of sea salt on the top layer before chilling. This not only enhances texture but also elevates the overall flavor profile of your peanut butter cups, pushing them into gourmet territory.
Storage and Shelf Life
These peanut butter cups can be stored in an airtight container in the refrigerator for about a week. However, to maintain optimal texture and flavor, consider keeping them separate using parchment paper between layers. If you plan to enjoy them later, freezing is also an excellent option; just ensure they are fully set and wrapped tightly to prevent freezer burn. They can last for up to three months in the freezer.
When ready to serve frozen peanut butter cups, simply let them sit at room temperature for about 10-15 minutes before enjoying. This will ensure the chocolate shell softens slightly, making for a delightful eating experience without compromising the filling.
Questions About Recipes
→ Can I use milk chocolate instead?
Yes, you can substitute with dairy-free milk chocolate for a sweeter flavor.
→ How long do they last?
These peanut butter cups can last up to a week in the fridge.
→ Is it possible to use almond butter instead?
Absolutely! Almond butter works great in this recipe, just make sure it's smooth.
→ Can I freeze these?
Yes, they freeze well. Just make sure to separate layers with parchment paper.
Homemade Peanut Butter Cups Vegan Style
What You'll Need
For the Cups
- 1 cup dark chocolate chips (dairy-free)
- 2 tablespoons coconut oil
For the Filling
- 1/2 cup natural peanut butter
- 1/4 cup powdered sugar
- 1/2 teaspoon vanilla extract
How-To Steps
In a microwave-safe bowl, combine the dark chocolate chips and coconut oil. Microwave in 30-second intervals, stirring in between until melted and smooth.
Line a muffin tin with cupcake liners. Pour a tablespoon of the melted chocolate into each liner, smoothing it to cover the bottom.
In a bowl, mix the peanut butter, powdered sugar, and vanilla extract until creamy and well combined.
Add a spoonful of the peanut butter mixture on top of the melted chocolate in each liner, then cover with more chocolate until the filling is fully enclosed.
Place the muffin tin in the refrigerator for at least 15 minutes or until fully set. Once firm, enjoy your homemade peanut butter cups!
Extra Tips
- Try adding a sprinkle of sea salt on top before chilling for an extra flavor boost!
Nutritional Breakdown (Per Serving)
- Calories: 120 kcal
- Total Fat: 9g
- Saturated Fat: 5g
- Cholesterol: 0mg
- Sodium: 50mg
- Total Carbohydrates: 9g
- Dietary Fiber: 1g
- Sugars: 5g
- Protein: 4g